Set Up the Oracle Client on the Reveille 8 User Analytics Server
For the Reveille 8 User Analytics server to be able to connect to the Oracle database, a TNS entry needs to be created to identify the Oracle server and the database. Use the 64-bit Oracle Windows full client. The below example is for Oracle 11g. Discuss with your DBA to understand Oracle client setup options for your Oracle environment.
To configure the Oracle 64-bit client on the Reveille 8 User Analytics server, complete the following steps:
- Start the Oracle Net Configuration Assistant by going to Start > All Programs > Oracle – OraClient11g_home1 > Configuration and Migration Tools > Net Configuration Assistant. The Net Configuration Assistant opens.
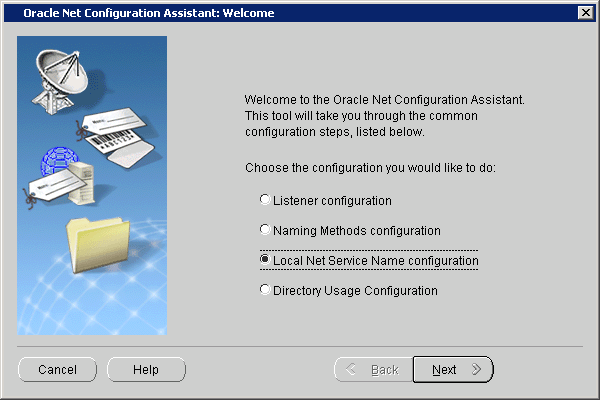
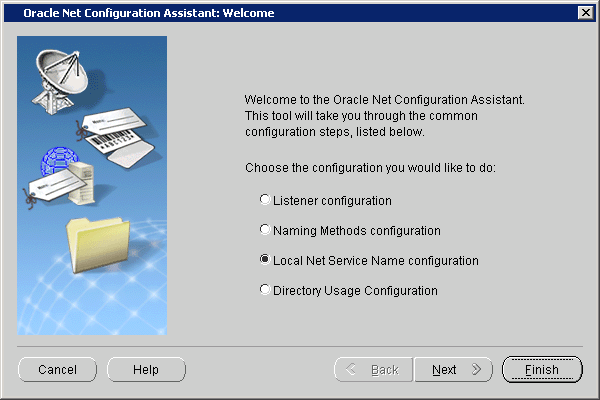
- Select Local Net Service Name configuration and click Next. The Net Service Name Configuration window appears with Add selected.
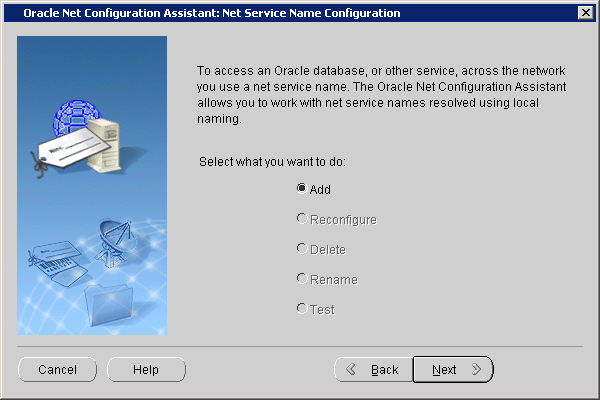
- Click Next. The Net Service Name, Service Name Configuration page appears.
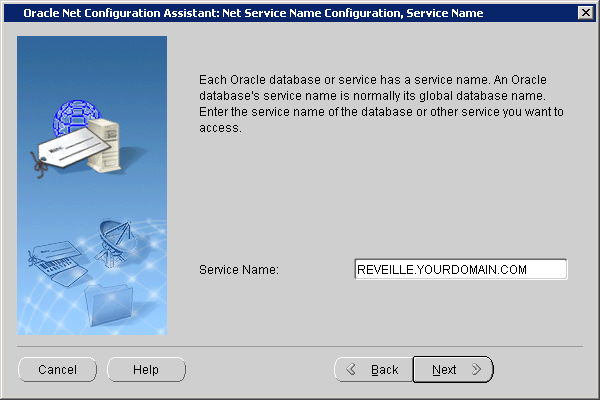
- Enter the full name of the Oracle 10g service created when you created the database and click Next. The Net Service Name, Select Protocols page appears.
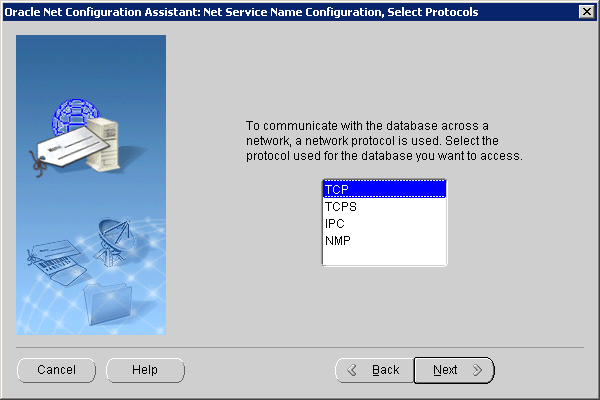
- Select TCP and click Next. The Net Service Name, TCP/IP Protocol page is shown.
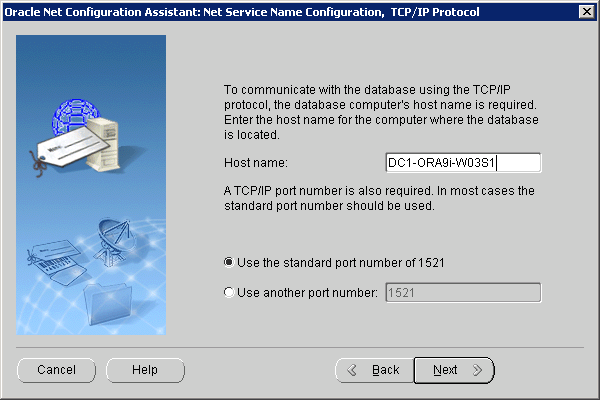
- Enter the host name of the Oracle 10g server, select Use the standard port number of 1521 option, and click Next. The Net Configuration Assistant: Net Service Name, Test page appears.
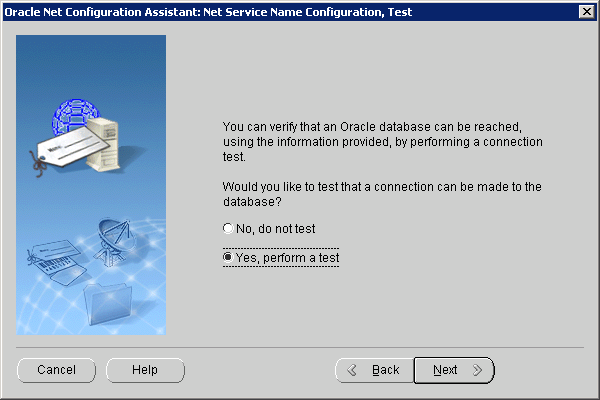
- Select Yes, perform a test, and click Next. The Test Connection page appears next. It will indicate the test did not succeed.
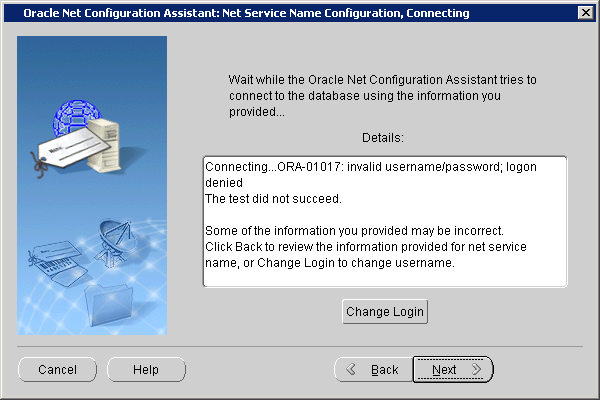
- The login needs to be changed for the test to succeed. Click Change Login. The Change Login screen appears.
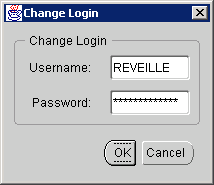
- Enter the Oracle username and password for the Reveille database and click OK. Check with your Oracle DBA for the correct Oracle username and password. You will be returned to the Test Connection page.
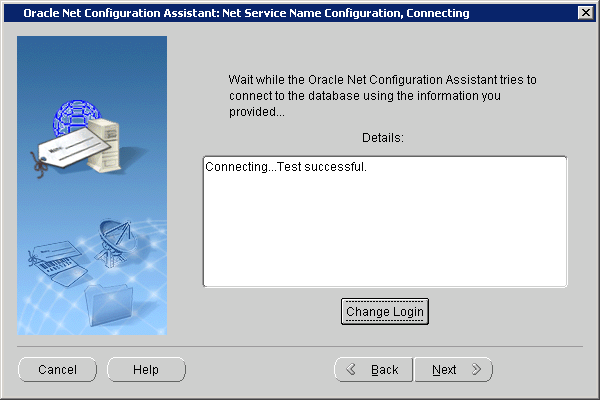
- If you entered the correct username and password, it will indicate the test succeeded. Click Next. The next screen prompts for the Net Service name.
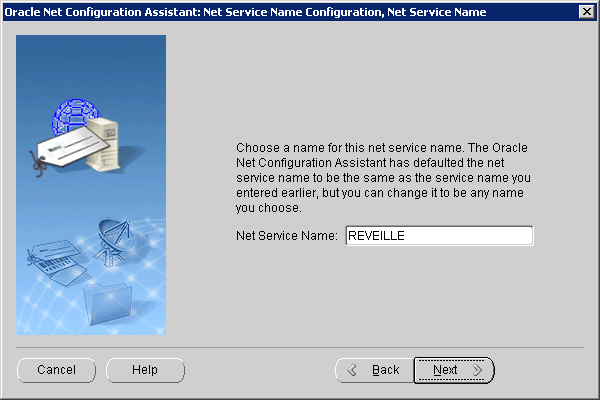
- Enter an appropriate name and click Next. The next screen asks if you want to set up another Net Service Name.
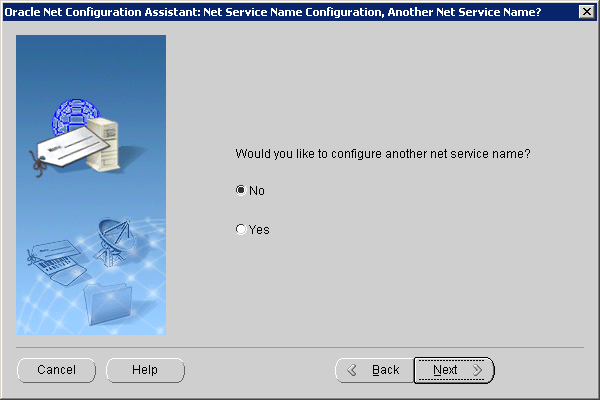
- Select No and click Next. The Net Service Name Configuration Done screen appears next.
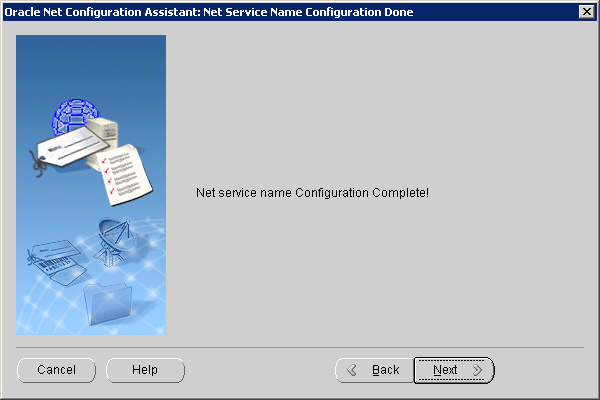
- Click Next. The Net Configuration Assistant: Welcome screen appears.
- Click Finish.
Was this helpful?
Please tell us why:
Thank you.